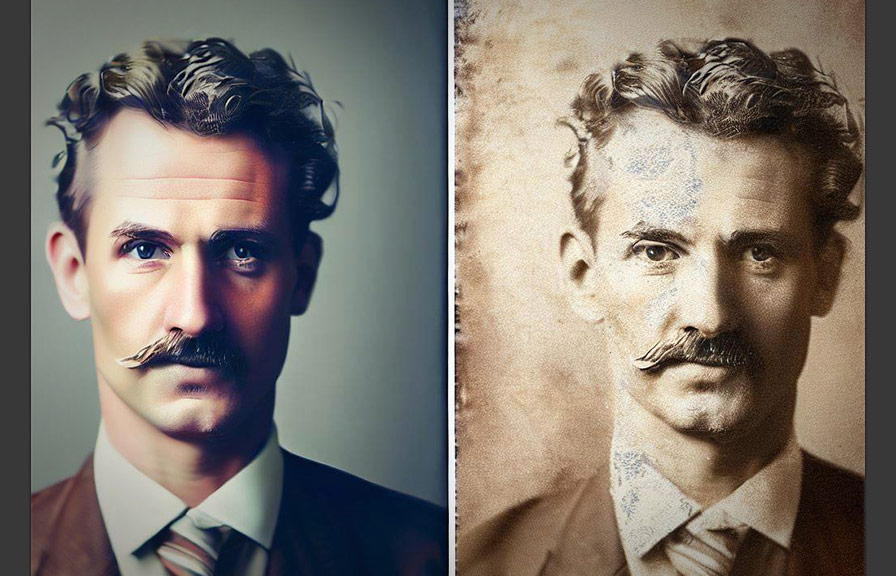
Did you know that the first-ever photograph was taken in 1826 by Joseph nicephore niepce? since then, photography has come a long way, and so has the technology to restore and repair damaged images. it's incredible to think that we can now bring old, worn-out photos back to life with
The help of digital tools and techniques. in this post, we'll explore the fascinating world of photo repair, fixing photo imperfections, and repairing image damage.
Fun fact: the world's oldest photograph
The world's oldest surviving photograph is the "view from the window at le gras", taken by joseph Nicephore Niepce in 1826. this photo was captured using a technique called heliography, which involved an eight-hour-long exposure! imagine waiting that long for a single photograph!
Understanding the reasons behind photo damage
There are many factors that can lead to a damaged photo. some of the most common reasons include:
- Physical damage: this includes tears, creases, water damage, and mold.
- Chemical damage: this can result from the breakdown of the chemicals used in the photographic process or from exposure to environmental factors such as air pollution.
- Light damage: prolonged exposure to sunlightor other bright light sources can cause photos to fade and lose their original colors.
Understanding the cause of the damage can help you determine the best approach for repairing the image.
Basic techniques for photo repair
Before diving into advanced digital tools, it's essential to understand some basic techniques for photo repair that can be applied to physical photographs. here are a few fundamental methods:
1. surface cleaning: this involves using a soft brush or cloth to gently remove any dirt, dust, or debris from the surface of the photograph.
2. flattening: if a photograph is wrinkled or creased, you can carefully flatten it by placing it between two sheets of acid-free paper and placing a heavy object on top for an extended period.
3. repairing tears: for minor tears, you can use acid-free tape or glue to carefully reattach the pieces.
Using digital tools for fixing photo imperfections
If you have access to digital tools such as photoshop or other image editing software, you can use them to fix a variety of imperfections in your photographs. here are some steps you can take to repair a damaged image:
1. scan the photo: first, you'll need to create a high-resolution digital copy of the damaged photograph. use a scanner to capture the image at the highest possible resolution.
2. clone stamp tool: this tool allows you to copy pixels from one area of the image and apply them to another area. it's useful for removing scratches, dust, or small imperfections.
3. healing brush tool: the healing brush tool works similarly to the clone stamp tool but is designed to blend the copied pixels more seamlessly with the surrounding area. This tool is suitable for fixing larger imperfections or areas of damage.
4. patch tool: the patch tool is excellent for repairing large areas of damage or missing pieces in a photograph. it works by selecting a damaged area and replacing it with a similar-looking area from another part of the image.
5. color correction: if your photograph has faded or discolored due to light exposure or chemical breakdown, you can use color correction tools to restore the original colors.
Advanced techniques for repairing image damage
For more complex cases of photo damage, you may need to employ advanced techniques that require a higher level of skill and expertise. some of these techniques include:
1. digital inpainting: this method involves using digital tools to "paint" missing or damaged areas of a photograph, taking into account the surrounding colors, textures, and patterns. it can be a time-consuming process but can yield impressive results when done correctly.
2. Reconstructing missing details: in some cases, you may need to reconstruct missing elements in a photograph from scratch. this can be done using a combination of digital painting and cloning techniques, along with a good understanding of the original subject matter.
3. Noise reduction and sharpening: old and damaged photographs can often appear grainy or blurry. using noise reduction and sharpening tools can help improve the overall image quality and make the restored photo look more polished.
Conclusion
Restoring damaged photos can be a complex and time-consuming process, but the results can be incredibly rewarding. by combining traditional photo repair techniques with modern digital tools, it's possible to breathe new life into old, damaged images and preserve precious memories for future generations.
Whether you're a seasoned professional or just getting started with photo restoration, there's always something new and exciting to learn in the world of image fixing and repairing.