
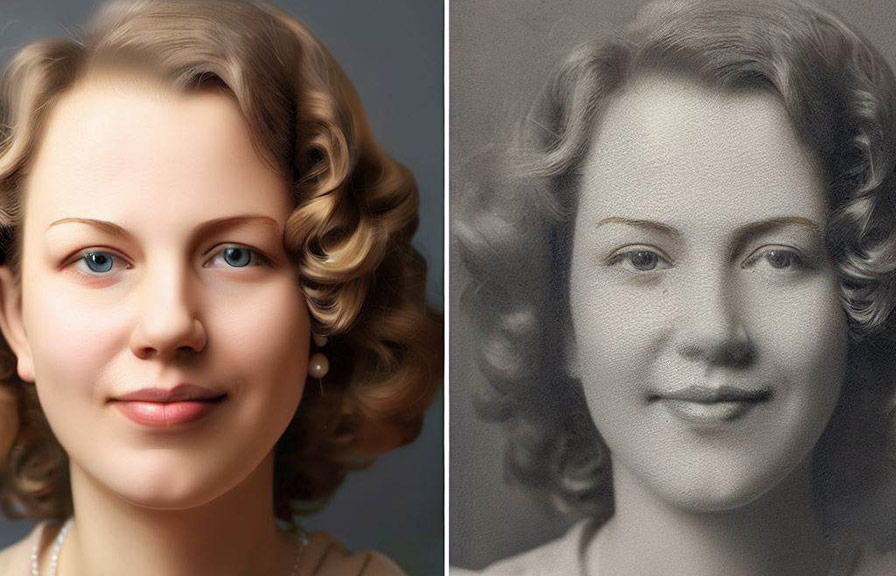
old photos often hold a special place in our hearts, capturing memories and moments that we cherish. however, as time passes, these photographs can become damaged, faded, or otherwise deteriorate in quality. photo restoration is the process of bringing life back into these old photos, preserving these memories for future generations.
In this blog post, we will discuss the steps involved in photo restoration, and how to sharpen, fix, and improve the quality of old photos.
Understanding photo restoration
photo restoration is the art and science of restoring the quality of old and damaged photographs. this process involves various techniques, including old photo restoration, picture restoration, photo repair, restore image, picture restoration, old damaged photo, photograph restoration, and repair old photos.
Many professional photo restoration services and enthusiasts use software like adobe photoshop to perform these tasks.
Step 1: digitize your old photos
The first step in photo restoration is to digitize your old photos. this means scanning or photographing the original print or negative to create a digital file. make sure you use a high-resolution scanner or camera, as this will provide a more detailed image to work with during the restoration process.
Step 2: assess the damage
Once you have a high-quality digital copy of your old photo, the next step is to assess the damage. this will help you determine which restoration techniques are needed to fix the issues. common types of damage include:
- Fading
- Scratches
- Stains
- Creases
- Torn edges
Step 3: clean up the image
Use a photo editing software like photoshop to clean up the image. this includes removing dust, scratches, and other imperfections. you can use tools like the clone stamp, healing brush, or patch tool to repair these issues.
Step 4: adjust the levels and curves
One of the primary challenges in old photo restoration is fixing the contrast and brightness levels. adjust the levels and curves in your image editing software to improve the overall tonal balance and bring out the details in the photo.
Step 5: fix color issues
Old photos often suffer from color fading or discoloration. use the color correction tools in your photo editing software to adjust the color balance, saturation, and hue of your image. this can breathe new life into your old photos, making them look vibrant and fresh.
Step 6: sharpen the image
In response to the question, "how do you sharpen old photos?", the answer lies in using sharpening tools within your photo editing software. these tools can help you bring out the finer details in your old photos, making them appear crisper and more defined.
Step 7: final touches
Once you have completed the restoration process, take a moment to review your work and make any final adjustments. this might include cropping the image, adding a subtle vignette, or applying a final sharpening pass.
How to fix old picture quality
Old picture quality can be fixed using a combination of the steps mentioned above. the key is to assess the specific issues in your old photo and apply the appropriate restoration techniques. this might include fixing fading, repairing damage, adjusting levels and curves, and sharpening the image.
How to fix the quality of an old photo
The process of fixing the quality of an old photo is similar to that of fixing old picture quality. it involves assessing the damage, applying appropriate restoration techniques, and making final adjustments to your image.
In summary, photo restoration is a valuable skill that can help you preserve your cherished memories for future generations. by following the steps outlined in this blog post, you can restore life and quality to your old photos, ensuring that they continue to be a source of joy and nostalgia
For years to come.