Adobe photoshop is an incredibly powerful tool for image editing, graphic design, and other creative pursuits. one often-overlooked feature of photoshop is its built-in note tool, which allows you to add annotations directly to your project.
In this post, we'll explore some tips on how to effectively use the note tool in photoshop to enhance your workflow and optimize your creative process.
The basics: accessing and using the note tool
To get started with the note tool, follow these simple steps:
1. Open your project in photoshop. the note tool can be used with any existing or new project.
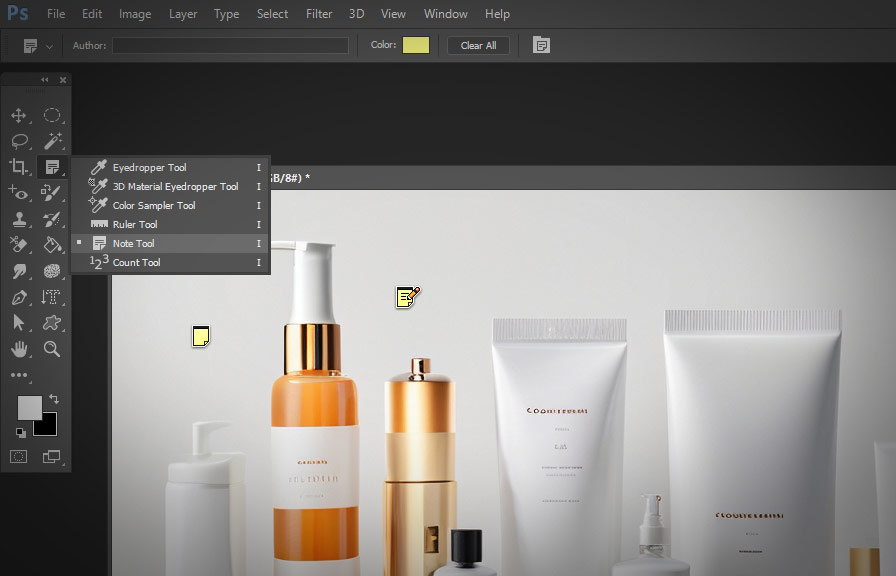
2. Select the note tool from the toolbar. it's represented by a speech bubble icon. if you don't see it, you may need to click and hold on another icon
(such as the eyedropper tool) to reveal hidden tools.
3. Click anywhere on your canvas to create a note. a small yellow note icon will appear at the location you clicked.
4. Type your annotation in the note window that pops up.
You can write anything that's relevant to your project, such as reminders, instructions, or feedback.
5. Close the note by clicking the "x" in the top-right corner of the note window. your annotation will be saved, and the yellow note icon will remain on your canvas.
Tip 1: organize your notes with layers
When working on complex projects, it's essential to keep your notes organized. one way to achieve this is by creating dedicated layers for your annotations. here's how:
1. Create a new layer by clicking the "create a new layer" button at the bottom of the layers panel.
2. Name the layer something descriptive, like "notes" or "annotations."
3. Select the note tool and create your annotations on the new layer.
By keeping your notes on a separate layer, you can quickly toggle their visibility on and off, making it easier to focus on your work.
Tip 2: customize your note tool settings
Did you know that you can customize the appearance and behavior of the note tool? to access these settings, follow these steps:
1. Select the note tool from the toolbar.
2. Open the note tool options by clicking the gear icon in the options bar at the top of the screen.
3. Adjust the settings to your preference.
You can change the note color, font, and size, among other options.
Customizing your note tool settings can help you differentiate between different types of annotations or convey a sense of hierarchy in your notes.
Tip 3: use keyboard shortcuts for efficiency
Keyboard shortcuts are a great way to speed up your workflow in photoshop. here are some useful shortcuts related to the note tool:
- Press n to quickly select the note tool.
- Press ctrl/cmd + alt + n to create a new note at the current location of your cursor.
- Press ctrl/cmd + shift + n to cycle through all the notes in your project.
Mastering these shortcuts will help you work more efficiently and make the most of the note tool's functionality.
Tip 4: export your notes for collaboration
If you're working with a team or sharing your project with a client, you may need to export your notes for easy reference. to do this, follow these steps:
1. Open the notes panel by navigating to window > notes.
2. Select all the notes you want to export by clicking on them while holding down the ctrl/cmd key.
3. Click the panel menu icon (three horizontal lines) in the top-right corner of the notes panel.
4. Choose "export selected note(s)" and save the file to your desired location.
Your notes will be saved as a plain text file, which can be easily shared and edited by others.
Conclusion
the note tool in photoshop is a versatile feature that can streamline your creative process and enhance collaboration. by following the tips outlined in this blog post, you'll be well on your way to mastering this handy tool and getting the most out of your photoshop projects.
Happy annotating!