Did you know that the red-eye effect in photographs is caused by the reflection of light from the retinas of your subject's eyes? this pesky phenomenon occurs when a camera flash bounces off the blood vessels at the back of the eye and creates an eerie red glow.
But fear not, adobe photoshop has a nifty solution to this problem: the red eye tool. in this blog post, we'll guide you through the process of using this tool to effectively eliminate the red-eye effect from your photos, revealing professional-looking results.
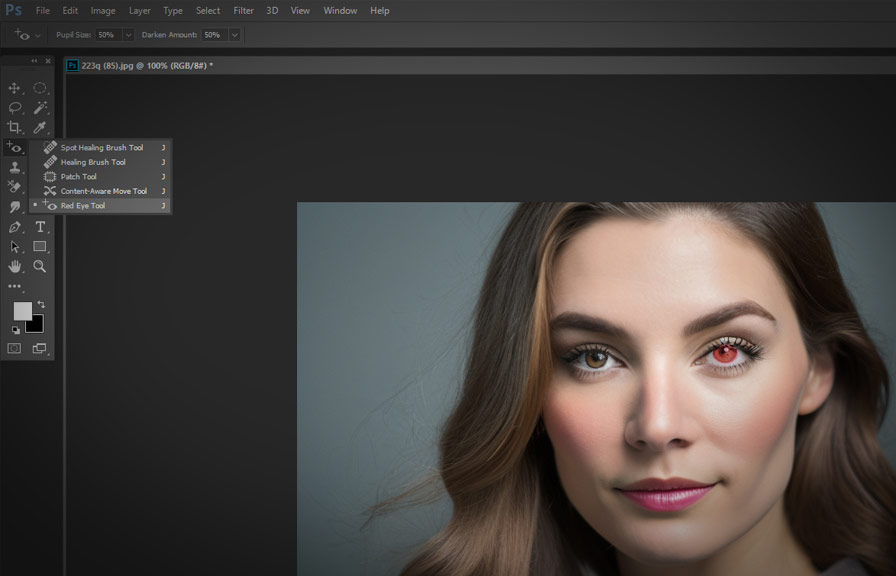
Step 1: find the red eye tool
First and foremost, open your image in photoshop. once your image is loaded, locate the red eye tool in the toolbar. if you can't find it, it might be hiding under the spot healing brush tool.
Click and hold on the spot healing brush tool, and a fly-out menu will appear, revealing the red eye tool.
Step 2: zoom in and adjust your view
To precisely target the red-eye area, you'll want to zoom in on the subject's eyes. use the zoom tool (z) or press `ctrl` + `+` (windows) or `cmd` + `+` (mac) to zoom in. you can also hold down the `spacebar` to activate the hand tool and move your image
Around for a better view.
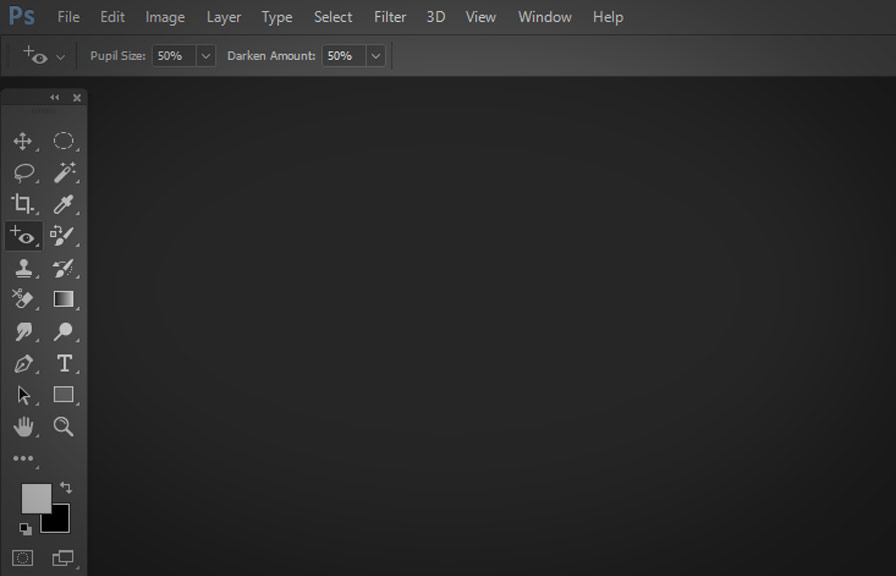
Step 3: configure the red eye tool settings
With the red eye tool selected, look at the options bar at the top of the screen. here, you'll find two settings: pupil size and darken amount.
- pupil size: this slider determines the area photoshop will analyze to find the red-eye. a higher value means a larger area will be searched. generally, a setting between 50% and 70% works well for most images.
- darken amount: this setting controls how much the red eyes are darkened. a higher value will produce darker, more intense results. start with a value of 50% and adjust as needed.
Step 4: apply the red eye tool
Now it's time to use the red eye tool on your image. position the cursor over the center of the red eye, then click once. photoshop will analyze the area and automatically replace the red with a more natural color.
If the initial result isn't satisfactory, you can undo the change by pressing `ctrl` + `z` (windows) or `cmd` + `z` (mac) and adjust the pupil size and darken amount settings before trying again.
Step 5: fine-tune the results
In some cases, the red eye tool may not produce perfect results. if you still see some red or the eye appears too dark, you can fine-tune the correction using other photoshop tools.
- dodge tool: to lighten the eye area, select the dodge tool (o) and set the range to "midtones" and exposure to around 10%. brush gently over the eye to lighten it up.
- burn tool: if the eye appears too light, use the burn tool (also found under the dodge tool) with the same settings as the dodge tool to darken the area.
- hue/saturation adjustment layer: for more control over the color, add a hue/saturation adjustment layer by clicking on the "create new fill or adjustment layer" icon at the bottom of the layers panel. use the "hand" tool within the properties panel to click and drag on the red area to adjust the hue and saturation.
An intriguing fact about the red eye effect
Here's an interesting tidbit: some animals, like cats and dogs, have a special reflective layer called the tapetum lucidum at the back of their eyes. this layer helps them see better in low light conditions, but it also causes a strong red-eye effect in photographs.
So, the next time you notice a pair of glowing eyes in a pet photo, remember that it's a sign of their enhanced night vision!
Conclusion
The red eye tool in photoshop is a powerful and easy-to-use solution for correcting the red-eye effect in your images. by following these steps, you can say goodbye to those pesky red eyes and achieve professional-looking results with minimal effort.
Happy editing!