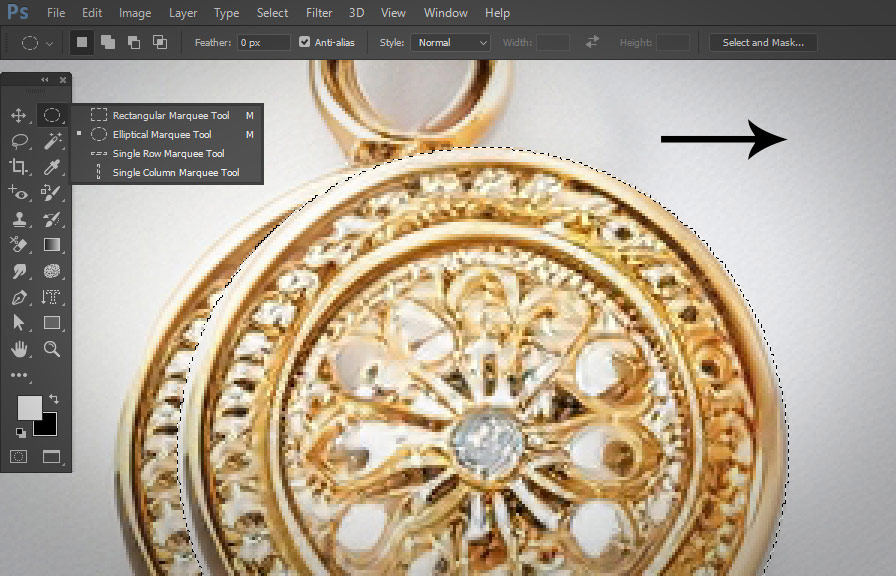
Did you know that the elliptical marquee tool has been a part of photoshop since its very first version, in this post, we will explore some interesting tips and tricks on how to use the elliptical marquee tool in photoshop to enhance your photo editing skills.
The basics of the elliptical marquee tool
First, let's discuss the fundamental aspects of the elliptical marquee tool. you can find it in the photoshop toolbar, nested under the rectangular marquee tool. click and hold the rectangular marquee tool icon, and then select the elliptical marquee tool from the dropdown menu.

To use the tool, click and drag your mouse over the area you want to select. the elliptical selection will expand from the point where you first clicked. holding down the Shift key while dragging will constrain the selection to a perfect circle.
Tip 1: resizing and moving your selection
Once you've made an elliptical selection, you can resize or move it without altering its shape. to do this, simply press and hold the Spacebar while still holding down the mouse button. this will allow you to reposition the selection as you continue to drag.
Release the Spacebar when you're satisfied with the position, and then continue to adjust the size.
Tip 2: subtracting and adding to selections
The elliptical marquee tool can be used in combination with other marquee tools to create complex selections. to add to an existing selection, hold down the Shift key while using the tool. to subtract from a selection, hold down the Alt (windows) or Option (mac) key.
Tip 3: feathering your selection
Feathering softens the edges of a selection, making it blend more seamlessly with the surrounding area. to apply feathering to an elliptical selection, go to the Select menu, choose Modify, and then Feather.
Enter a feather radius value, and click Ok. note that a higher value will result in a softer edge.
Tip 4: transforming your selection
You can transform your elliptical selection by going to the Select menu and choosing Transform selection. this will enable you to scale, rotate, or skew the selection. remember to press Enter (windows) or Return (mac) to apply the transformation.
Tip 5: saving and loading selections
If you've created a complex selection using the elliptical marquee tool and other selection tools, you might want to save it for future use. to do this, go to the Select menu and choose Save selection.
You can then load the saved selection later by going to Select > load selection.
Tip 6: creating vignettes
The elliptical marquee tool is perfect for creating vignettes, which are decorative borders that gradually fade into the image. to create a vignette, follow these steps:
1. create a new layer by going to Layer > new > layer.
2. make a large elliptical selection that covers most of the image.
3. apply feathering to the selection (as discussed ).
4. Invert the selection by going to Select > inverse.
5. fill the selection with black or another color by going to Edit > fill and choosing the desired color.
6. adjust the layer opacity to your liking.
Conclusion
The elliptical marquee tool is a powerful and versatile tool in photoshop, perfect for creating selections, vignettes, and more. by mastering these tips, you can unlock new creative possibilities in your photo editing projects. so, go ahead and experiment with the elliptical marquee tool to see what amazing effects you
Can achieve!
