Did you know that the slice tool in photoshop can help you create seamless web designs and save precious time? in an industry where efficiency is essential, the slice tool can be your best friend. in this blog post, we will delve into the intricacies of this underrated tool and
Provide you with tips and tricks to help you master the slice tool and elevate your graphic design game.
A brief history: the birth of the slice tool
Before diving into the how-to, let us take a moment to appreciate the slice tool's origins. the slice tool was initially introduced in adobe photoshop 6.0, released in september 2000, as a means to simplify web design.
At the time, web designers relied heavily on html tables to create complex layouts, which was a time-consuming process. the slice tool offered a way to streamline this process and revolutionize the way designers approached web design.
The power of the slice tool: a hidden gem
So, what exactly is the slice tool? it is a powerful, yet often overlooked, feature in photoshop that allows you to divide an image into smaller sections or "slices." these individual slices can then be exported separately, making it easier to optimize images for the web or design elements that
Need to be assembled later. moreover, the slice tool helps maintain the organization of your photoshop project, ensuring that you stay on top of your game.
Getting started: how to access the slice tool
To access the slice tool, follow these simple steps:
1. open adobe photoshop and load the image you want to work with.
2. navigate to the toolbar on the left side of the screen.
3. click and hold the crop tool icon (or press C on your keyboard).
4. From the drop-down menu, select the slice tool.
Now that you have the slice tool in hand, let's delve into some tips on how to use it effectively.
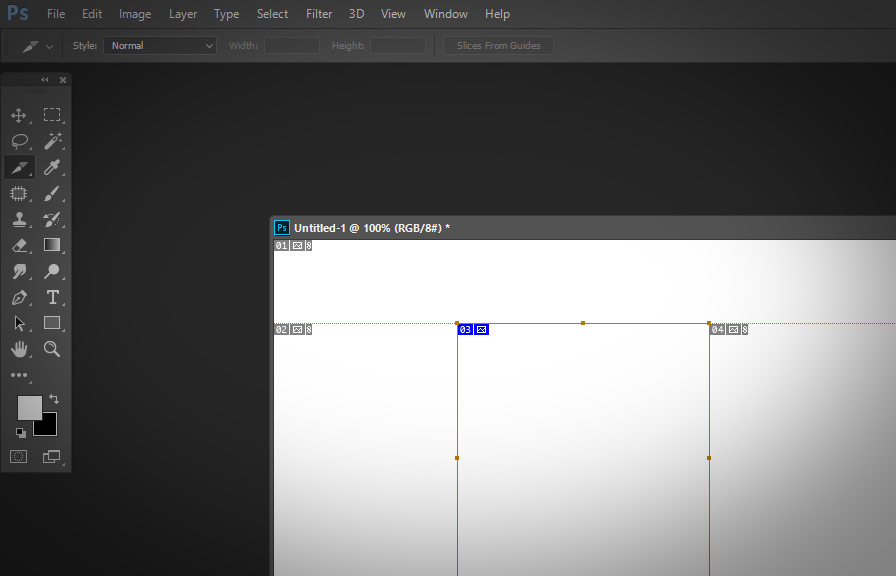
Tip 1: create slices based on guides
When working with the slice tool, guides can be your best friend. to create slices based on guides, follow these steps:
1. create guides by dragging them from the rulers (press Ctrl+r or Cmd+r to show rulers if they aren't visible).
2. arrange the guides to define the areas you want to slice.
3. with the slice tool selected, navigate to the top menu, and click Slices >
Create slices from guides.
This method allows you to create precise, evenly spaced slices, ensuring that your design remains consistent across all elements.
Tip 2: use the slice select tool to fine-tune your slices
The slice select tool is an excellent companion to the slice tool, allowing you to make adjustments to your slices quickly. to access the slice select tool, click and hold the slice tool icon and select the slice select tool from the drop-down menu.
With the slice select tool, you can:
- Move slices by clicking and dragging.
- Resize slices by dragging their edges or corners.
- Combine or divide slices by selecting multiple slices and right-clicking to access the context menu.
Tip 3: utilize the layer-based slice feature
Layer-based slices are an advanced feature that allows you to create slices based on specific layers in your photoshop document. to create a layer-based slice, follow these steps:
1. select the layer you want to create a slice from in the layers panel.
2. right-click on the layer and choose Create slice.
Layer-based slices can be especially useful when working with complex designs, as they allow you to focus on specific elements without affecting the entire image.
Tip 4: export your slices with the save for web feature
After creating and fine-tuning your slices, it's time to export them for use. the save for web feature in photoshop allows you to optimize and export your slices in various formats, such as jpeg, png, or gif.
To export your slices, follow these steps:
1. go to File > Export > Save for web (legacy).
2. choose the desired file format and optimization settings for your slices.
3. click Save and choose a destination folder for your exported slices.
And there you have it! with these tips and tricks, you are well on your way to mastering the slice tool in photoshop. embrace the power of the slice tool and unlock your full graphic design potential today.