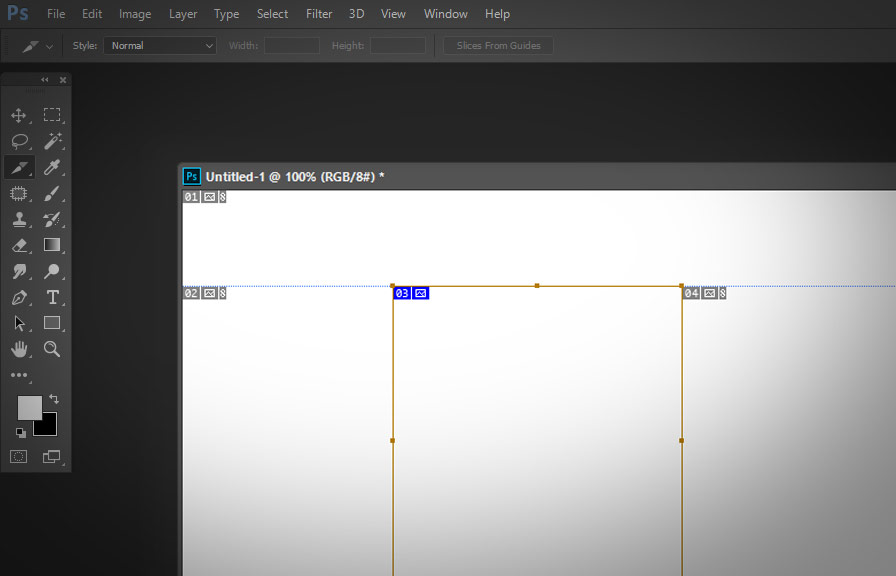
Did you know that the slice select tool in photoshop has been around since version 6.0, released in the year 2000? this versatile tool is often overlooked, but it can be a game-changer for web designers and digital artists.
In the post, we'll dive into the lesser-known aspects of the slice select tool, giving you tips and tricks to make the most of this powerful feature in photoshop.

What is the slice select tool?
The slice select tool, hidden beneath the crop tool in the toolbar, is designed to help you divide an image into smaller sections, or "slices." these slices can be exported as separate images, making it perfect for web designers who need to create image maps, navigation bars, or individual elements
For a website layout.
How to activate the slice select tool
To start using the slice select tool in photoshop, follow these simple steps:
1. select the Crop tool from the toolbar on the left side of the screen.
2. click and hold the crop tool icon, then choose the Slice select tool from the drop-down menu that appears.
3. Alternatively, you can press C on your keyboard until the slice select tool is active.
Now that you have activated the tool, let's explore some tips and tricks to make the most of its features.
Tip 1: create precise slices with guides
Before you start slicing your image, it's a good idea to have a clear plan for the layout. using guides in photoshop can help you create precise slices that align with your design.
1. press Ctrl+r (windows) or Cmd+r (mac) to show the rulers along the top and left edges of the workspace.
2. click and drag on the rulers to create horizontal and vertical guides that define your desired slice boundaries.
3. With the Slice tool active, click and drag to create slices that snap to the guides, ensuring perfect alignment.
Tip 2: adjust slice dimensions with the options bar
When you create a new slice, the options bar at the top of the screen displays several options that allow you to fine-tune the dimensions and position of the slice.
1. with a slice selected, adjust the Width and Height values in the options bar to change the size of the slice.
2. to reposition the slice, adjust the X and Y values in the options bar.
These options are especially useful when you need to create slices with specific dimensions or align them with other elements in your design.
Tip 3: divide slices automatically
If you need to divide an image into evenly sized slices, photoshop offers a convenient automatic slicing feature.
1. with the Slice tool active, right-click (windows) or control-click (mac) on your image.
2. choose Divide slice from the context menu.
3. in the Divide slice dialog box, specify the number of Rows and Columns you want to divide the slice into, and click Ok.
Photoshop will automatically create new slices based on your input, saving you time and effort.
Tip 4: rename slices for better organization
By default, photoshop assigns generic names to the slices you create, such as "slice 1" or "slice 2." to keep your project organized and make it easier to identify slices when exporting, consider renaming them.
1. double-click on a slice with the Slice select tool to open the Slice options dialog box.
2. enter a descriptive name in the Name field and click Ok.
Renaming your slices can also help with seo, as the names you assign will be used as the file names when exporting the images.
Tip 5: export slices as separate files
Once you've created and organized your slices, you can export them as separate image files.
1. go to File > export > save for web (legacy).
2. in the Save for web dialog box, customize the file format and quality settings as needed.
3. click Save and choose a destination folder for your exported images.
4. In the Save optimized as dialog box, select Images only from the Format dropdown menu, and click Save.
Photoshop will export each slice as a separate file, using the slice names you assigned earlier.
With these tips in hand, you're now equipped to make the most of the slice select tool in photoshop. explore its potential to streamline your web design process and create pixel-perfect layouts. happy slicing!
