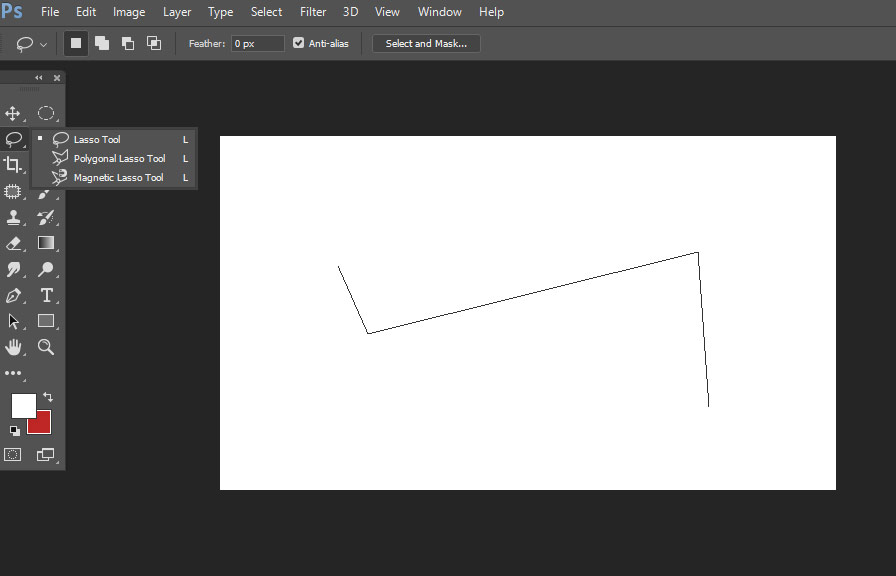
Did you know that the polygonal lasso tool has been a part of photoshop's arsenal since its first release in 1990? that's right! this versatile and powerful selection tool has stood the test of time, allowing users to make precise selections with ease.
In this post, we will explore various tips and tricks to help you make the most of the polygonal lasso tool in photoshop. so, whether you're a beginner or an experienced user, you're sure to find something valuable in the tips we share below.

Understanding the basics of the polygonal lasso tool
Before diving into the tips, let's briefly discuss the polygonal lasso tool's basic functionality. this tool is designed for making straight-edged selections in an image. it allows users to select a specific area by clicking on various points to create a selection with straight lines.
Once the selection is closed, you can apply various adjustments or effects to the selected area.
To access the polygonal lasso tool, press `l` on your keyboard or click on the lasso tool in the toolbar and hold down the mouse button to reveal the dropdown menu. then, choose the polygonal lasso tool from the list.
Tip 1: use straight lines for faster selections
The polygonal lasso tool is perfect for selecting areas with straight edges. instead of painstakingly tracing the edges with the regular lasso tool or the magnetic lasso tool, use the polygonal lasso tool to click on the corners or endpoints of the area you want to select.
This method is much quicker and more accurate.
Tip 2: zoom in for more accurate selections
To achieve the best results, it's essential to zoom in on the area you're working on. press `z` on your keyboard and click on the area you want to zoom into. the closer the view, the more precise your selections will be, especially when working with smaller details.
Tip 3: utilize the shift and alt/option keys
While using the polygonal lasso tool, holding down the `shift` key allows you to create straight lines at 45-degree angles. this feature is especially useful when selecting geometric shapes or maintaining consistent angles in your selection.
On the other hand, holding down the `alt` key (or `option` key on macos) temporarily activates the regular lasso tool, allowing you to create freehand selections when needed. this feature is beneficial when you need to select both straight and curved edges in a single selection.
Tip 4: close the selection with a double click
When you're done creating your selection, you can close it by double-clicking or connecting the endpoint to the starting point. alternatively, you can press `ctrl + d` (or `cmd + d` on macos) to deselect and start over if you're not satisfied with your selection.
Tip 5: modify the selection with the add and subtract modes
If you need to add or subtract from an existing selection, use the add and subtract modes available in the options bar. the add mode (indicated by a small plus sign next to the cursor) allows you to create additional selections that will be combined with the existing one.
Similarly, the subtract mode (indicated by a small minus sign) lets you remove parts of the selection.
Tip 6: feather your selection for smooth transitions
Sometimes, it's necessary to create smooth transitions between the selected and unselected areas of an image. to do this, use the feather option in the options bar. by entering a value for feathering, you can create a gradual transition between the selection's edges and the surrounding area.
This technique is especially useful for blending adjustments and effects seamlessly.
Tip 7: use the polygonal lasso tool in combination with other selection tools
Don't be afraid to combine the polygonal lasso tool with other selection tools in photoshop. for instance, you can use the magic wand tool to select a large area with a uniform color, and then refine the selection with the polygonal lasso tool to achieve more precise results.
The hidden gem: bonus tip
Many photoshop users are unaware of the tool's ability to create selections with curved lines. while the polygonal lasso tool is designed for straight-edged selections, you can create curved lines by clicking and dragging while holding down the `alt` key (or `option` key on macos).
This feature is not well-documented, but it can be a lifesaver when you need to create a selection with both straight and curved edges.
By implementing these tips and tricks, you can take your photoshop skills to new heights and make the most of the polygonal lasso tool. so, go ahead, experiment with this versatile tool, and unleash your creativity!
