Did you know that the dodge tool in photoshop was inspired by a traditional darkroom technique? in the world of film photography, dodging is a technique used during the printing process to selectively lighten certain areas of an image.
With the advent of digital photography, adobe photoshop incorporated this technique as the dodge tool, allowing photographers and designers to achieve similar results with just a few clicks.
In this blog post, you'll learn some valuable tips on how to use the dodge tool in photoshop effectively, and we'll even share an intriguing fact related to this powerful tool. so, let's dive in!
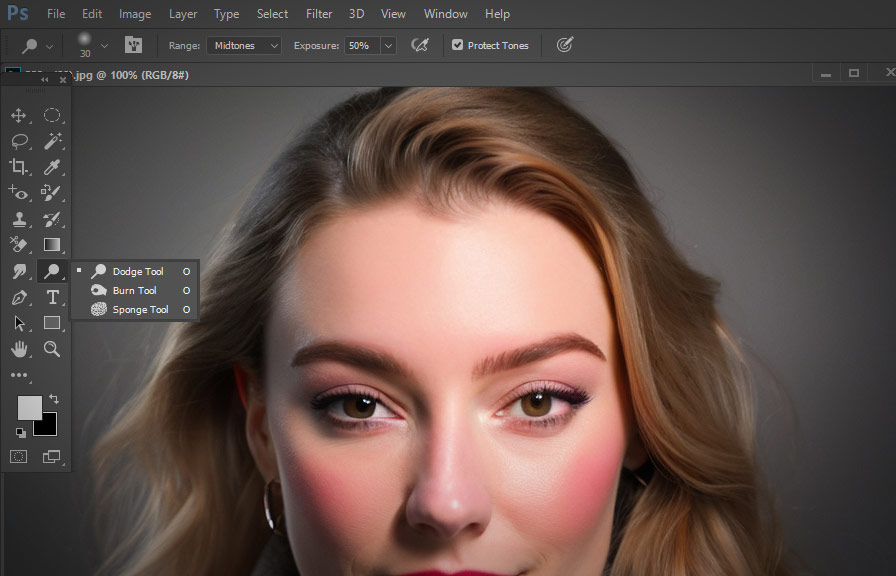
Understanding the dodge tool
The dodge tool is primarily used to lighten specific areas of an image. by carefully applying this tool, you can enhance details, create depth, and add contrast to your photos. the dodge tool can be found in photoshop's toolbar, or you can access it quickly by pressing the "o" key.
Setting up the dodge tool
1. Choose the dodge tool: click on the dodge tool icon in the toolbar or press "o" on your keyboard.
2. Select the brush: in the options bar at the top of the screen, you can choose the brush size, hardness, and type.
A soft-edged brush is generally recommended for smoother and more natural results.
3. Range: you can select between shadows, midtones, and highlights. this determines which tonal range the tool will primarily affect. start with the midtones for general lightening.
4. Exposure: adjust the exposure percentage to control the intensity of the effect. lower values will produce subtle changes, while higher values will create more dramatic effects.
Now that the dodge tool is set up let's explore some tips on how to use it effectively.
Tip 1: use a low exposure setting
Working with a low exposure setting (around 10-20%) allows you to build up the effect gradually. this helps you avoid overexposing the image and gives you more control over the final result. you can always increase the exposure for specific areas if needed.
Tip 2: work with layer masks
Instead of dodging directly on your image, create a new layer and fill it with 50% gray. set the blend mode of this layer to "overlay." now, when you use the dodge tool on this layer, the effect will be applied non-destructively, and you can easily remove or modify it
Using layer masks.
Tip 3: combine with the burn tool
The burn tool is the counterpart to the dodge tool, and it's used to darken specific areas of an image. by using both tools in tandem, you can create a more balanced and dynamic image. consider using the dodge tool to lighten highlights and midtones while using the burn tool
To darken shadows.
Tip 4: be selective and precise
Instead of applying the dodge tool to an entire area, focus on specific parts of the image where you want to enhance details or create depth. this will create a more natural and professional-looking result.
Tip 5: use adjustment layers for additional control
If you find that you've overdone the dodging or burning, you can use adjustment layers, such as curves or levels, to fine-tune the overall image contrast and brightness.
Intriguing fact: dodging in space photography
Did you know that the historic apollo moon landing photographs were enhanced using dodging techniques? the original images were captured on film and then developed in a darkroom. to bring out the details in the lunar surface and the astronauts' suits, technicians skillfully applied dodging and burning techniques during the
Printing process.
Now that you have a better understanding of how to use the dodge tool in photoshop, it's time for you to experiment and harness the power of this versatile tool. with practice and creativity, you'll be able to enhance your images and create stunning, professional-quality results.