Did you know that the color replacement tool in photoshop has been part of the software since version cs? that's right! since its introduction in 2003, this nifty tool has helped countless designers and photographers effortlessly change the colors in their images.
In this blog post, we'll share some tips and tricks to help you master this useful tool and unleash your creativity.
Understanding the color replacement tool
Before diving into the tips, it's essential to understand how the color replacement tool works. unlike other methods that require selecting and masking, this tool allows you to paint over the desired color while preserving the texture and luminosity of the original image.
This makes it perfect for tasks like changing the color of clothing, products, or even hair without affecting the rest of the image.
Selecting the color replacement tool
To access the color replacement tool, click and hold the brush tool in the toolbar. a fly-out menu will appear, and you can choose the color replacement tool from the list.
Tips and tricks for using the color replacement tool in photoshop
Now that you know the basics, let's explore some tips to help you use the color replacement tool effectively:
1. choose the right brush size and hardness
Select a brush size that is appropriate for the area you want to change the color of. a smaller brush allows for more precision, while a larger brush can cover broader areas more quickly. additionally, adjust the brush hardness to control the edge sharpness.
A lower hardness value will create softer edges that blend seamlessly with the surrounding area.
2. select the correct sampling mode
The color replacement tool offers three sampling modes: continuous, once, and background swatch. each mode determines how the tool samples colors:
- continuous: samples colors continuously as you paint, allowing you to replace multiple colors in one stroke.
- once: samples the color only once when you first start painting, ideal for replacing a single color.
- background swatch: replaces only the color that matches the current background swatch, giving you more control over the color replacement.
3. use tolerance wisely
Tolerance is a setting that determines the range of colors the tool will replace. a lower tolerance value means the tool will only replace colors that closely resemble the sampled color, while a higher value allows for a broader range of colors to be replaced.
Experiment with different tolerance settings to achieve the desired effect.
4. toggle anti-alias and contiguous
The anti-alias option ensures smooth edges when replacing colors, while the contiguous option restricts color replacement to adjacent pixels that match the sampled color. depending on your project, you may need to toggle these options on or off for the best results.
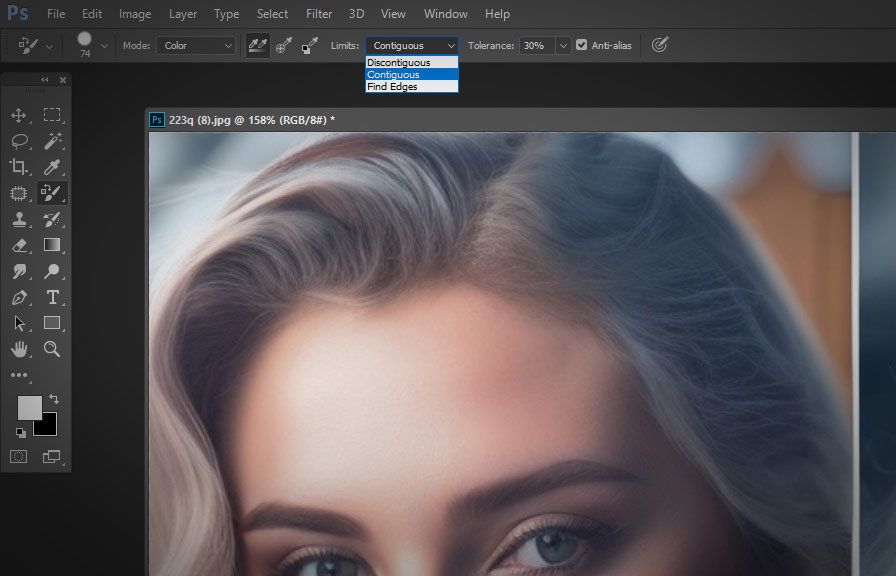
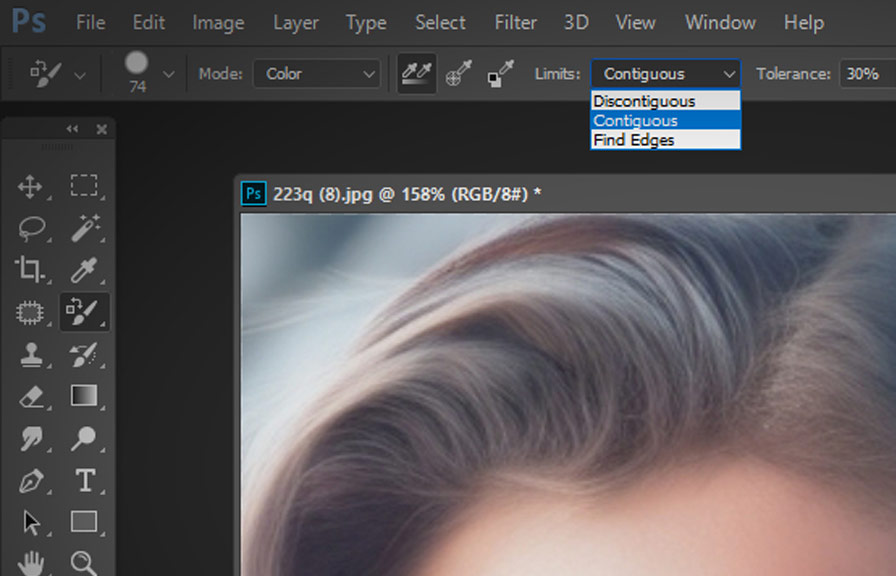
5. adjust the limits setting
The limits setting offers two options: discontiguous and contiguous. discontiguous allows the tool to replace colors in non-adjacent pixels, while contiguous only replaces colors in adjacent pixels. use the appropriate setting based on the image and desired outcome.
6. experiment with blend modes
While the default blend mode for the color replacement tool is 'color,' you can experiment with different blend modes to achieve unique effects. for example, using the 'hue' blend mode will replace only the hue of the sampled color, preserving the original image's saturation and luminosity.
7. use the undo command
Mistakes can happen, and it's essential to know how to undo any unwanted color changes. the undo command (ctrl+z or cmd+z) will reverse the last action, allowing you to correct any errors.
8. practice, practice, practice!
Like any other skill, mastering the color replacement tool takes time and practice. the more you use it, the more comfortable and proficient you'll become.
Conclusion
The color replacement tool is a powerful feature in photoshop that can save you time and effort when changing colors in your images. by following these tips and experimenting with the tool's settings, you can unlock your creativity and achieve stunning results.
Now go ahead and start playing with colors!