Photoshop is a treasure trove of powerful tools that can elevate your image editing skills to a whole new level. one such feature is the refine edge brush tool, which first appeared in photoshop cs5 as part of the refine edge dialog box.
What sets this tool apart from others is its ability to make precise selections, especially when it comes to intricate and complex edges. this is a lifesaver for anyone who has struggled with selecting hair, fur, or other fine details in an image.

In this post, we will explore some tips and tricks to help you master the refine edge brush tool in photoshop. by the end of this post, you'll be able to refine your selections with ease and obtain professional-looking results.
Understanding the refine edge brush tool
Before diving into the tips, it's essential to understand how the refine edge brush tool works. this tool is designed to improve the edge selections made using other selection tools like the quick selection tool, magic wand tool, or the lasso tool.
It works by detecting the edges within a selected area and refining them for a smoother, more accurate result.
Now that we have a basic understanding of the tool, let's move on to the tips.
1. work on a duplicate layer
It's always a good idea to work on a duplicate layer when using the refine edge brush tool. this will ensure that your original image remains unaltered, and you can easily compare the results before and after refining the selection.
To create a duplicate layer, press `ctrl + j` (windows) or `cmd + j` (mac).
2. use the select and mask workspace
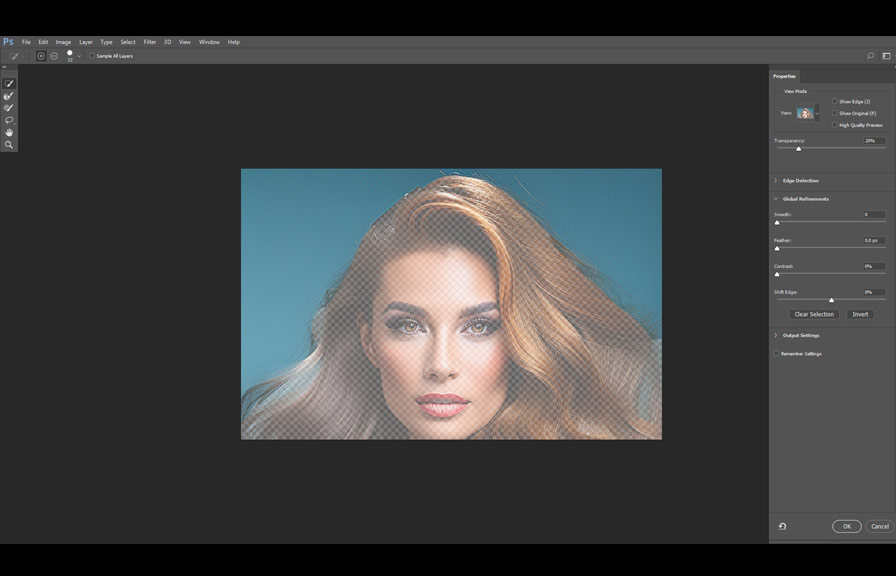
Instead of working with the refine edge brush tool through the old refine edge dialog box, switch to the select and mask workspace. this workspace was introduced in photoshop cc 2015.5 and offers a better user experience and additional features.
To access this workspace, make an initial selection and then click on the `select and mask` button in the options bar or go to `select > select and mask`.
3. customize the view mode
When working with the select and mask workspace, you can choose from various view modes to display your selection. these modes include onion skin, marching ants, overlay, and more. experiment with different view modes to find the one that best suits your needs and helps you see the edges you're
Refining.
4. adjust the brush size and hardness
The size and hardness of the refine edge brush tool are crucial factors in achieving precise results. use the `[` and `]` keys to decrease or increase the brush size, respectively. for the brush's hardness, a lower value will create a softer edge, while a higher value will produce a
Sharper edge. you can adjust the hardness by holding `shift` and using the `[` and `]` keys.
5. use smart radius
When working with complex edges, the smart radius feature can come in handy. it automatically adjusts the radius of your brush to detect and refine intricate details, such as hair or fur. to enable smart radius, check the `smart radius` box in the edge detection settings of the select and
Mask workspace.
6. brush in small strokes
When using the refine edge brush tool, it's best to paint in small strokes rather than one long stroke. this allows for better control and precision, and reduces the risk of over-refining the edges.
7. focus on problematic areas
Instead of refining the entire selection, focus on the problematic areas where the edges need improvement. this will help you achieve the best results without over-processing the image.
8. use the output settings
Once you're happy with the refined selection, don't forget to utilize the output settings in the select and mask workspace. you can choose to output the selection as a new layer with a mask, a new layer, a new document, or other options depending on your needs.
Did you know?
The refine edge brush tool is not limited to refining edges around hair or fur. you can also use it to refine selections around objects with semi-transparent or translucent edges, such as glass, smoke, or fog.
With these tips in your arsenal, you're well on your way to mastering the refine edge brush tool in photoshop. remember, practice makes perfect, so keep experimenting and refining your skills to achieve the best results.
Happy editing!
