Photoshop is an incredibly powerful tool, and amongst its vast array of features, there is one that often gets overlooked - the single column marquee tool. this seemingly simple tool possesses the ability to perform tasks that other, more complex tools might struggle with.
So, if you're ready to take your photoshop skills to the next level, it's time to dive into the world of the single column marquee tool.

Did you know? the single column marquee tool was first introduced in photoshop 4.0, which was released in november 1996. this version of photoshop was a game-changer as it introduced adjustment layers and actions, among other key features.
The basics of the single column marquee tool
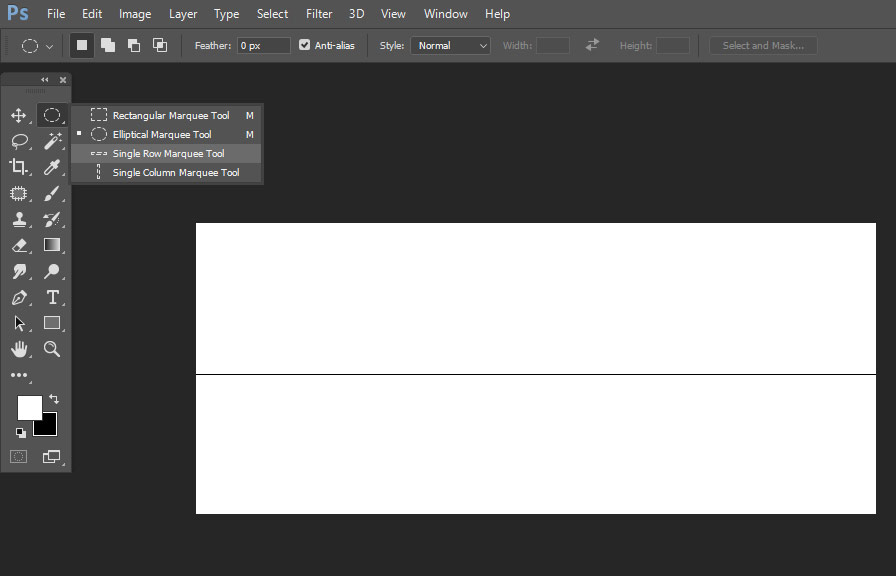
Before we delve into the tips and tricks, let's cover the basics. the single column marquee tool is used to make a 1-pixel wide vertical selection in your image. you can find this tool by right-clicking on the rectangular marquee tool icon in the toolbar, then selecting the single column marquee
Tool from the list.
To use the tool, simply click on your image where you want the selection to begin and the single column marquee tool will create a straight, vertical selection line. from there, you can perform various tasks such as copying the selected area, creating a new layer, or applying adjustments.
Now that we've covered the basics, let's dive into some lesser-known tips and tricks to help you make the best use of this powerful tool.
Tip 1: aligning layers with precision
The single column marquee tool is an excellent way to align layers with precision. to do this, follow these steps:
1. select the single column marquee tool and click on the starting point of the layer you want to align.
2. create a new layer by clicking on the "create a new layer" icon at the bottom of the layers panel.
3. Fill the selection with a solid color by pressing `shift + f5` and choosing a color from the fill dialog box.
4. move the new layer below the layer you want to align.
5. select the top layer, and then press `v` to activate the move tool.
6. With the move tool active, press and hold the `shift` key while clicking and dragging the layer to align it with the colored column you created earlier.
7. once the layers are aligned, delete the colored column layer.
Tip 2: creating vertical guides
By using the single column marquee tool, you can create accurate vertical guides, which are especially helpful for web and print design projects. here's how:
1. create a new document or open an existing one in photoshop.
2. set the rulers to your desired unit of measurement by right-clicking on the ruler and choosing from the list.
3. activate the single column marquee tool and click on the desired location for the guide. 4.
Click and drag from the ruler into the workspace, while holding the `shift` key to snap the guide to the selection.
5. release the mouse button to place the guide.
Tip 3: selecting complex shapes
This tool can also help you select complex shapes in your image. for example, you may want to select and isolate a single element, like a tree, from a photograph. here's how to do it:
1. open the image containing the element you want to isolate.
2. activate the single column marquee tool and click on one side of the element.
3. create a new layer and fill the selection with a solid color. 4.
Repeat this process, creating multiple vertical selections and filling them with the same color, until the entire element is covered.
5. use the magic wand tool (`w`) to select the colored area.
6. with the selection active, switch back to the original image layer and press `ctrl + j` to
Create a new layer with the selected element.
Tip 4: measuring distances and angles
You can use the single column marquee tool to measure distances and angles in your image. here's how:
1. activate the single column marquee tool and click on the starting point of the distance or angle you want to measure.
2. go to the info panel (`window` > `info`) to view the x-coordinate of the starting point.
3. Move the cursor to the endpoint while holding down the `shift` key.
4. check the info panel again for the x-coordinate of the endpoint.
5. calculate the distance or angle by finding the difference between the starting and ending x-coordinates.
By exploring these tips and tricks, you'll find that the single column marquee tool is an indispensable part of your photoshop toolbox. it's time to harness its full potential and elevate your design skills to new heights.
Happy photoshopping!