Photoshop is a powerful tool that enables artists and designers to create stunning visuals. one of the lesser-known, yet incredibly useful tools in this software is the Add to selection tool. it's a hidden gem that can make your work in photoshop more efficient and precise.
In this post, we'll explore this tool and provide tips to master its use.
What is the add to selection tool?
The add to selection tool allows you to select multiple areas of an image without losing your previous selections. this is particularly useful when working with complex compositions or editing intricate details. it works with various selection tools, such as the marquee, lasso, and magic wand tools.
Tips on using the add to selection tool in photoshop
1. accessing the add to selection tool
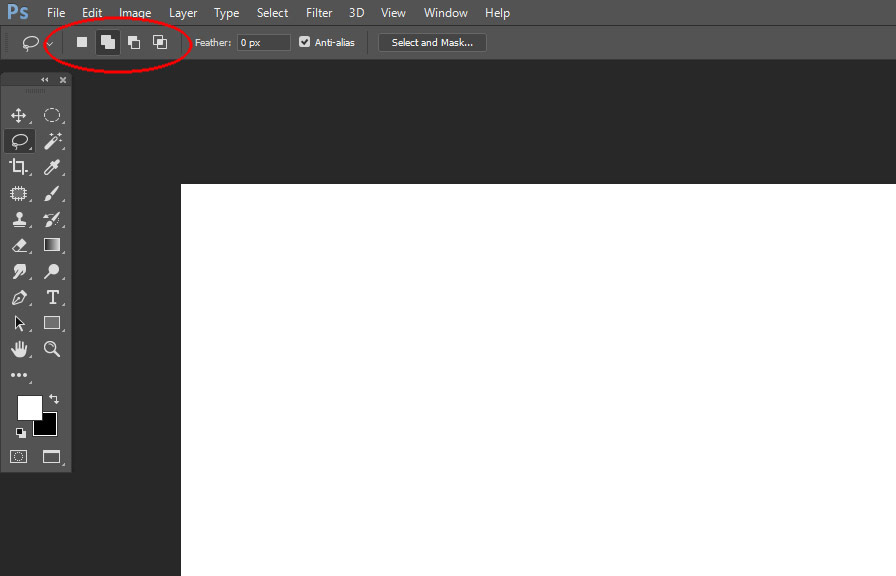
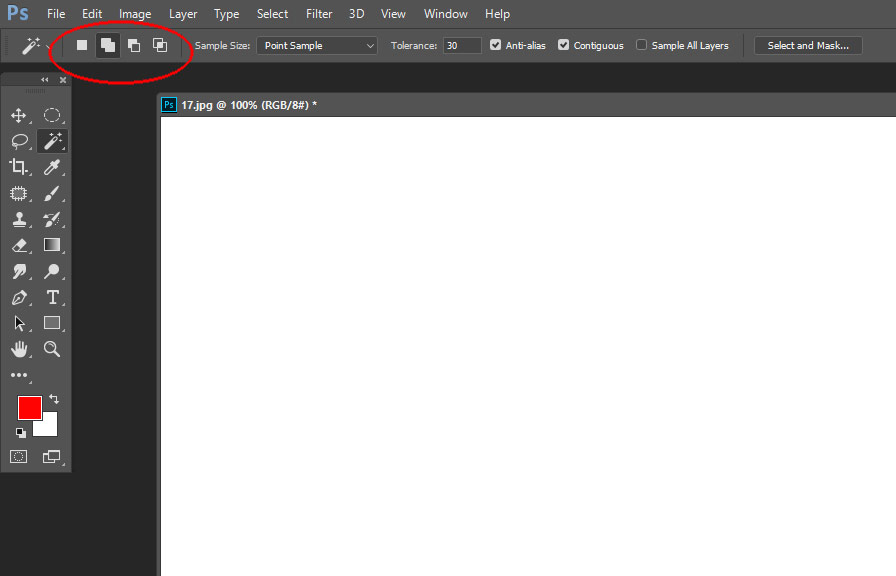
To access the add to selection tool, you can either press and hold the `shift` key or click the second icon (with a small plus sign) in the options bar when using a selection tool.
2. combine selections for complex shapes
When working with irregular shapes, you can use the add to selection tool to combine selections made with different tools. for example, you can start with the lasso tool to select a rough outline, then use the magic wand tool to refine the selection based on color or tone.
3. save time with keyboard shortcuts
Mastering keyboard shortcuts can save you time and make your workflow more efficient. to add to your selection, simply press and hold the `shift` key while using any of the selection tools. you can also use `ctrl` (or `cmd` on a mac) + `shift` + `d` to reselect a previous
Selection.
4. utilize the subtract and intersect modes
While the add to selection tool is great for expanding your selections, you can also subtract or intersect selections for even more control. to subtract from a selection, press and hold the `alt` (or `option` on a mac) key, or select the third icon (with a small minus sign) in
The options bar. to intersect selections, press and hold both `shift` and `alt` (or `shift` and `option` on a mac), or click the fourth icon in the options bar.
5. feather your selections for smooth edges
When you've made your selection, you might notice that the edges are too sharp or pixelated. to create smoother edges, you can use the feather option in the select menu. this will create a gradual transition between the selected and unselected areas, resulting in a more natural look.
6. refine your selections with the select and mask workspace
After creating your selection, you can further refine it using the select and mask workspace. this feature provides an array of tools to fine-tune your selection, such as the refine edge brush, which detects and adjusts the selection around tricky areas like hair or fur.
7. save your selections for later use
If you're working on a project that requires you to repeatedly use the same selection, consider saving it. to do this, go to the select menu and choose `save selection`. you can then load the saved selection at any time by going to `select` > `load selection`.
Wrapping up
The add to selection tool in photoshop is a versatile feature that can significantly improve your workflow. by mastering its use, you'll be able to work more efficiently and achieve precise results in your projects. so, the next time you're using photoshop, give the add to selection tool a try
And unlock its full potential!