
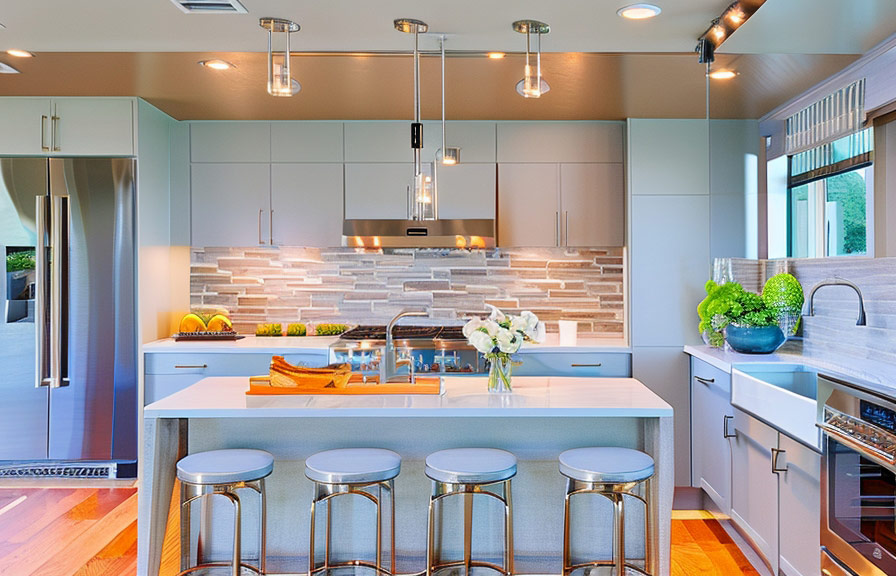
Did you know that homes with professional photos sell 32% faster than those with amateur photos? in today's competitive real estate market, capturing the perfect shot is crucial for attracting potential buyers. with the rise of online listings, high-quality real estate photos have become more important than ever.
In this blog post, we'll cover the best settings, lenses, and lighting techniques for real estate photography. by the end, you'll have everything you need to create stunning, eye-catching images that help your property stand out from the crowd.
And here's a fun fact: the world's most expensive photograph, "rhein ii" by andreas gursky, sold for a staggering $4.3 million in 2011!
The best settings for real estate photography
Achieving professional-quality real estate photos requires the right camera settings. here are the key settings to consider:
1. Aperture: an aperture of f/8 to f/11 is ideal for real estate photography. this range provides a deep depth of field, ensuring that both the foreground and background are in focus. avoid going below f/5.6, as this can result in a shallow depth of field and blurry background.
2. Shutter speed: to prevent camera shake and ensure sharp images, use a shutter speed of at least 1/60th of a second. if you're using a tripod, you can go as low as 1/30th of a second.
3. Iso: keep your iso as low as possible to minimize noise and grain in your images. a range of 100-400 is suitable for most real estate photography. if you're shooting in low-light conditions, you may need to increase the iso, but try not to exceed 800.
4. White balance: to ensure accurate colors, set your camera's white balance to "auto" or choose the appropriate setting for your lighting conditions (e.g., "daylight" for outdoor shots and "tungsten" for indoor shots with incandescent lighting).
5. File format: shoot in raw format to capture the most detail and allow for greater flexibility when editing your images in post-processing.
The best lenses for real estate photography
Choosing the right lens is crucial for capturing high-quality real estate photos. here are some recommended lenses for different types of properties:
1. Wide-angle lens: a wide-angle lens (16-35mm) is the go-to choice for most real estate photographers. it allows you to capture more of the room in a single shot, making small spaces appear larger and more spacious.
Be careful not to go too wide, as this can cause distortion and make the room look unnatural.
2. Tilt-shift lens: a tilt-shift lens (e.g., canon ts-e 17mm f/4l) can help correct perspective distortion, which is common when photographing tall buildings or interiors with high ceilings. while these lenses are expensive, they can be a valuable investment for professional real estate photographers.
3. Zoom lens: a versatile zoom lens (e.g., 24-105mm) can be useful for capturing detail shots of a property's features or for shooting in tight spaces where a wide-angle lens may not be suitable.
How to light your real estate for photography
Lighting plays a significant role in creating professional real estate photos. here are some tips for achieving the best lighting in your images:
1. Natural light: whenever possible, take advantage of natural light by shooting during the day. open curtains and blinds to let in as much light as possible. overcast days are ideal for outdoor shots, as they provide soft, even lighting.
2. Artificial light: when natural light isn't sufficient, use artificial lighting to brighten up the space. a combination of ambient lighting (e.g., ceiling lights and lamps) and off-camera flash can help create a balanced, well-lit scene.
3. Off-camera flash: invest in one or more off-camera flashes to illuminate dark corners and balance out bright windows. bounce the flash off walls or ceilings to create soft, even lighting. you can also use diffusers or softboxes to further soften the light.
4. Hdr (high dynamic range) photography: in challenging lighting situations, such as when there's a significant difference between the indoor and outdoor light levels, consider using hdr photography. this technique involves taking multiple exposures of the same scene at different exposure settings and then merging them in post-processing to
Create a single image with a balanced exposure.
5. Post-processing: use photo editing software like adobe lightroom or photoshop to fine-tune your images' exposure, contrast, and color balance. this process can help you achieve a polished, professional look.
Conclusion
Taking professional real estate photos that attract buyers is a blend of using the right camera settings, choosing the appropriate lenses, and mastering lighting techniques. by following these recommendations, you'll be well onyour way to creating stunning images that showcase your property in the best light possible.
And remember, practice makes perfect! the more you experiment with different settings, lenses, and lighting setups, the better your skills will become.
As a bonus tip, consider staging your property to make it more visually appealing in your photographs. a well-staged home can not only help attract potential buyers, but it can also make your photography efforts shine.
Some simple staging ideas include decluttering, adding decorative elements like throw pillows or artwork, and arranging furniture to create a welcoming and spacious environment.
With the right techniques and a little bit of practice, you'll be well on your way to capturing professional real estate photos that grab the attention of potential buyers and help your property sell faster. so grab your camera, and happy shooting!