Did you know that the quality of your jewelry photos can make or break your online sales? that's right! a good jewelry photo can increase customer engagement and boost your jewelry sales. but how do you take stunning jewelry photos that will make your jewelry sparkle and shine?
In this blog post, we'll share with you some insider tips on how to light, pose, and edit jewelry photos like a pro. plus, we'll reveal a little-known fact about jewelry photography that might surprise you!

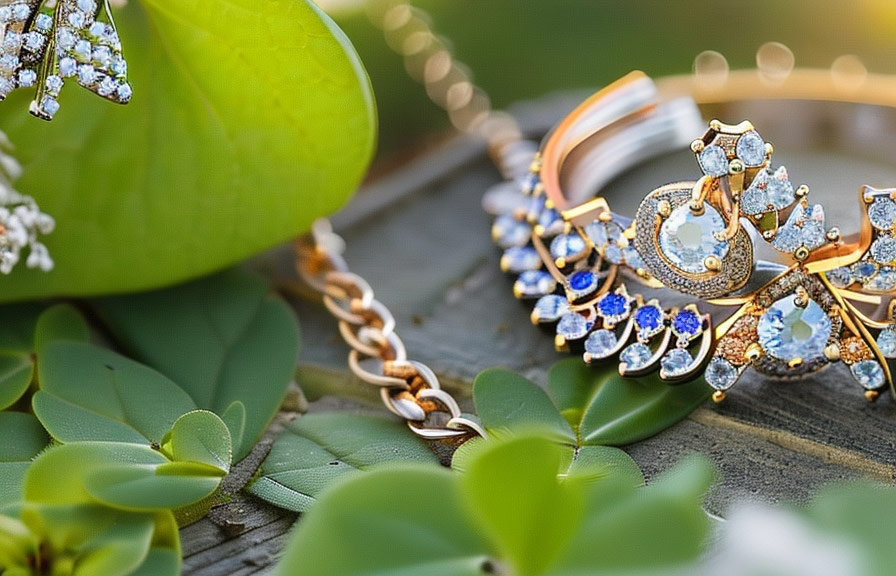
The importance of lighting in jewelry photography
Lighting is the key to capturing the true beauty of your jewelry pieces. it can either make your jewelry look stunning or dull and lifeless. so, how do you light jewelry for photography? follow these tips to get the perfect lighting setup:
1. Use natural light: natural light is the best light source for jewelry photography. it provides soft, even lighting that showcases the intricate details and colors of your jewelry. set up your shoot near a window or outside on a cloudy day to take advantage of natural light.
2. Avoid direct sunlight: direct sunlight can create harsh shadows and overexpose your jewelry, making it difficult to see the details. if you must shoot in direct sunlight, use a diffuser or a reflector to soften the light.
3. Use a lightbox: a lightbox is a great investment for jewelry photographers. it provides a controlled environment where you can manipulate the light to get the desired effect. choose a lightbox with adjustable led lights and a diffuser to get the best results.
4. Experiment with different light angles: the angle of the light can dramatically change the appearance of your jewelry. try positioning the light source at different angles to find the best look for your piece.
Now that you know how to light your jewelry photos, let's move on to posing!
Posing jewelry for captivating photos
The way you pose your jewelry can make a big difference in the overall aesthetics of your photos. keep these tips in mind when setting up your jewelry for a photo shoot:
1. Use props: props can help showcase your jewelry in a more interesting and creative way. consider using a necklace stand, ring cone, or bracelet bar to display your pieces. just make sure the props don't distract from the jewelry itself.
2. Showcase the details: make sure to capture the unique features of your jewelry, such as the gemstones, engravings, and intricate designs. use a macro lens or a smartphone with a macro setting for close-up shots.
3. Play with angles: experiment with different angles to find the most flattering perspective for your jewelry. for example, photographing a necklace from above or a ring from the side can create a more dynamic and interesting image.
4. Create a cohesive look: if you're photographing a collection of jewelry, make sure the pieces are arranged in a visually pleasing and cohesive way. this will make your photos more appealing and easier to browse.
Now that you've mastered lighting and posing, let's dive into editing your jewelry photos!
How to edit jewelry photos for a polished finish
Editing your jewelry photos can help you achieve a professional and polished look. here are some tips to help you edit your images like a pro:
1. Adjust the exposure: make sure your jewelry is well-exposed by adjusting the brightness, contrast, and shadows in your photo editing software. a properly exposed photo will show the true colors and details of your jewelry.
2. Correct the white balance: the white balance in your photos can affect the appearance of your jewelry's colors. use your photo editing software to correct any color casts and ensure that the colors in your photos are accurate and vibrant.
3. Remove any imperfections: use the healing or clone tool in your photo editing software to remove any dust, scratches, or other imperfections from your jewelry photos.
4. Sharpen the details: use the sharpening tool or a high-pass filter in your photo editing software to enhance the details and textures of your jewelry. be careful not to over-sharpen, as this can create a harsh, unnatural look.
5. Crop and resize: crop your photos to focus on the jewelry and remove any unnecessary distractions. resize your photos to the appropriate dimensions for your website or online marketplace.
And finally, here's the fun fact we promised you! did you know that some jewelry photographers use a technique called "focus stacking" to create incredibly sharp images? focus stacking involves taking multiple photos of the same jewelry piece at different focus points and then combining them in post-processing to create
A single, sharp image. this technique is particularly useful when photographing small, detailed pieces like rings and earrings.
Conclusion
Taking a good jewelry photo involves mastering the art of lighting, posing, and editing. by following these tips and experimenting with different techniques, you'll be well on your way to creating stunning jewelry photos that will make your pieces shine and attract morecustomers.
Remember that practice makes perfect, so keep honing your skills and watch your jewelry photography improve over time. happy shooting!