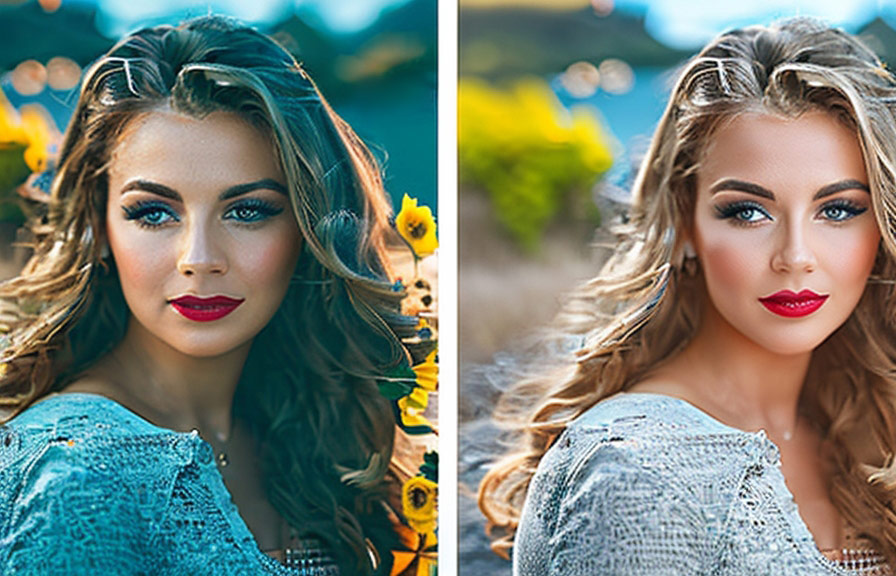
Did you know that the first fashion photography shoot is believed to have taken place in the year 1856? that's right, fashion photography has been around for over a century and a half! but don't worry, you don't need a time machine or a fancy camera to capture stunning model photos.
In this blog post, we'll show you how to make your model photos look professional with simple equipment, by choosing the right model, mastering photography tips, and editing your images.

Discovering the perfect model for your photography
Selecting the right model for your photography project is crucial, as their appearance and attitude can make or break your final image. here are some tips to help you find the perfect fit:
1. Define your project's theme or purpose: before starting your search for a model, it's important to have a clear idea of the theme or purpose of your project. this will help you determine the characteristics, look, and style you need in a model.
2. Consider working with amateur models: professional models can be expensive, and if you're working with simple equipment, it's possible to achieve great results with amateur models. many aspiring models are eager to build their portfolios and may be willing to work for free or at a reduced rate.
3. Browse social media and modeling platforms: social media platforms like instagram are goldmines for discovering new modeling talent. you can also explore dedicated modeling websites, such as model mayhem, to find models who match your desired look.
4. Review portfolios and conduct interviews: it's essential to review a potential model's portfolio to ensure they have the skills and experience you need. additionally, conducting interviews can help you gauge their personality and professionalism.
The best tips for taking model photos
Now that you've found the perfect model, it's time to get behind the camera. here are some top tips for taking incredible model photos with simple equipment:
1. Use natural light: natural light is your best friend when working with simple equipment. try to schedule your shoot during the golden hour (the hour after sunrise or before sunset) to capture soft, flattering light.
2. Experiment with angles and poses: encourage your model to try different poses and experiment with various camera angles to find the most flattering and dynamic shots.
3. Pay attention to the background: a clean, uncluttered background can make your model stand out. look for simple, neutral backgrounds that complement your model's outfit and the overall theme of your shoot.
4. Utilize a reflector: reflectors are an affordable way to manipulate and enhance natural light. they can help fill in shadows, add a catchlight to your model's eyes, or even create dramatic lighting effects.
5. Communicate with your model: establishing a strong rapport with your model is key to capturing natural, authentic expressions. give clear, concise directions, and don't be afraid to offer praise and encouragement.
Editing your model photos for a professional look
After capturing your images, it's time to take them to the next level with some editing magic. here are a few techniques to help you enhance your model photos:
1. Adjust exposure and contrast: start by correcting the exposure and contrast of your image to ensure it's properly balanced. this can help bring out the details and make your model pop.
2. Retouch skin imperfections: use a retouching tool, like the healing brush in adobe photoshop, to remove any blemishes or imperfections on your model's skin. be sure to keep the edits subtle and natural-looking.
3. Enhance eyes and lips: the eyes and lips are focal points in model photography, so it's essential to make them stand out. brighten the whites of the eyes, add a touch of saturation to the iris, and enhance the contrast of the lips to make them appear more
Vibrant.
4. Dodge and burn: dodge and burn is a technique used by professional photographers to create depth and dimension in their images. by selectively lightening and darkening areas of your photo, you can sculpt your model's face and create a more polished look.
5. Apply color grading: color grading is the process of adjusting the colors in your image to create a specific mood or style. experiment with different color combinations and adjustments to find the perfect look for your model photos.
Fun fact: did you know that the first digital camera was invented in 1975 by steve sasson, an engineer at kodak? it weighed 8 pounds and captured black and white images at a resolution of 0.01 megapixels.
We've come a long way since then, but even with today's advanced technology, the principles of great photography remain the same.
So, get out there and start capturing stunning model photos with your simple equipment. with the right model, creative techniques, and a little bit of editing magic, you can achieve professional results that will make your images stand out.
