
Did you know that the first digital image retouching was performed on a photo of the moon in 1966? the process was done by using a computer to remove the dark spots on the image, paving the way for the retouching techniques we know today.
In this post, we'll dive into the world of retouching techniques for model photography, exploring how they can take your images from ordinary to extraordinary.
The best retouching techniques for model photography
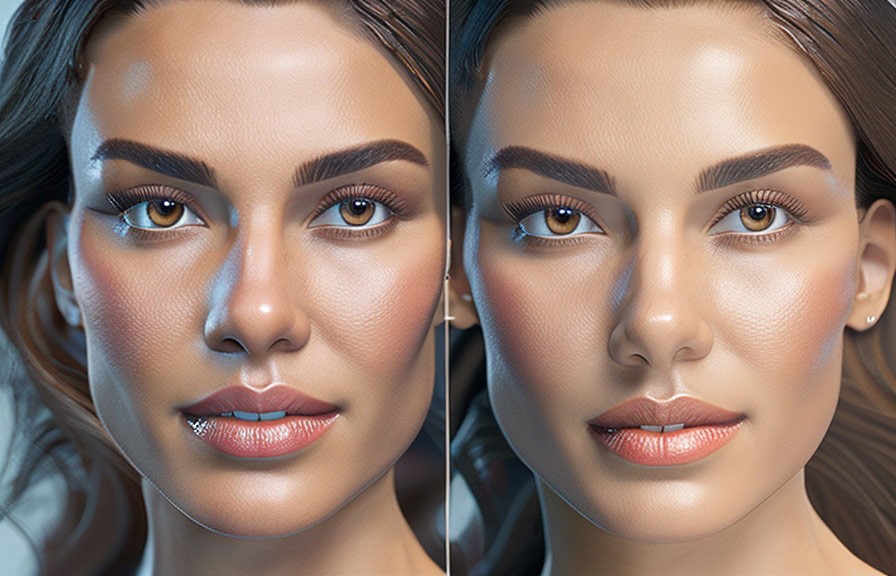
Model photography is all about capturing a moment that highlights the subject's beauty, style, and personality. to achieve this, photographers often rely on retouching techniques that enhance the final image. here are some of the best retouching techniques for model photography:
1. frequency separation
Frequency separation is a technique that separates an image into two layers: a high-frequency layer that contains the fine details and a low-frequency layer that contains the general color and tone information. this separation allows you to edit each layer independently, giving you more control over the final appearance of the image.
This technique is particularly useful for smoothing out skin textures and removing blemishes without losing the natural look of the skin.
2. dodge and burn
Dodge and burn are two retouching techniques that work in tandem to enhance the contrast and depth in your images. dodging lightens an area of the image, while burning darkens it. by using these techniques, you can accentuate the highlights and shadows in your model's face and body, creating a more
Dynamic and visually appealing image.
3. color grading
Color grading is the process of adjusting the colors and tones in an image to create a specific mood or atmosphere. this technique can be used to enhance the overall look of a model photo, making it more visually appealing and evocative.
Color grading can be achieved using tools like curves, hue/saturation, and selective color adjustments in photo editing software.
4. liquify
The liquify tool is a powerful retouching technique that allows you to manipulate the shape and form of elements in your image. this can be particularly useful for refining the contours of a model's face and body, ensuring that they are perfectly in line with the desired aesthetic.
However, it's important to use this technique sparingly to avoid creating an unnatural-looking image.
How to use retouching techniques to improve model photos
Now that we've covered some of the best retouching techniques for model photography, let's discuss how to use them effectively to improve your images.
Step 1: analyze the image
Before you dive into retouching, take a moment to analyze the image and determine which techniques will be most beneficial. consider factors such as lighting, composition, and the model's features when deciding which retouching techniques to apply.
Step 2: create a non-destructive workflow
When working with retouching techniques, it's essential to create a non-destructive workflow. this means using layers, masks, and adjustment layers in your photo editing software to ensure that you can make changes without permanently altering the original image.
This allows for greater flexibility and experimentation during the retouching process.
Step 3: start with basic adjustments
Before diving into more advanced retouching techniques, begin by making basic adjustments to your image. this may include cropping, straightening, and adjusting the exposure, contrast, and color balance. these simple adjustments can have a significant impact on the overall look of your image and provide a solid foundation for further
Retouching.
Step 4: apply retouching techniques
Once you have made basic adjustments to your image, it's time to apply the retouching techniques discussed earlier in this post. remember to work methodically and pay close attention to detail, as the quality of your retouching will have a significant impact on the final appearance of your image.
Step 5: refine and finalize
After applying your chosen retouching techniques, take a step back and examine the image as a whole. are there any areas that need further refinement? take the time to make any necessary tweaks and adjustments before considering your image complete.
As a fun fact, the term "photoshopped" has become synonymous with retouched images in popular culture. however, many people are unaware that the term actually originated as a reference to the adobe photoshop software, which was first released in 1990.
Conclusion
Retouching techniques are an essential part of professional model photography. by mastering the techniques discussed in this post, you can elevate your images to new heights, ensuring that they stand out in a crowded marketplace.
Remember, practice makes perfect, so don't be afraid to experiment and refine your skills to create stunning model photos that captivate your audience.